NVR local interface - Settings: System
This is where you keep your system operating to your specs.
- Basic Settings page
- Maintenance page
- Information page
Basic Settings page
This tile covers informational and administrative tasks.
General Settings tab
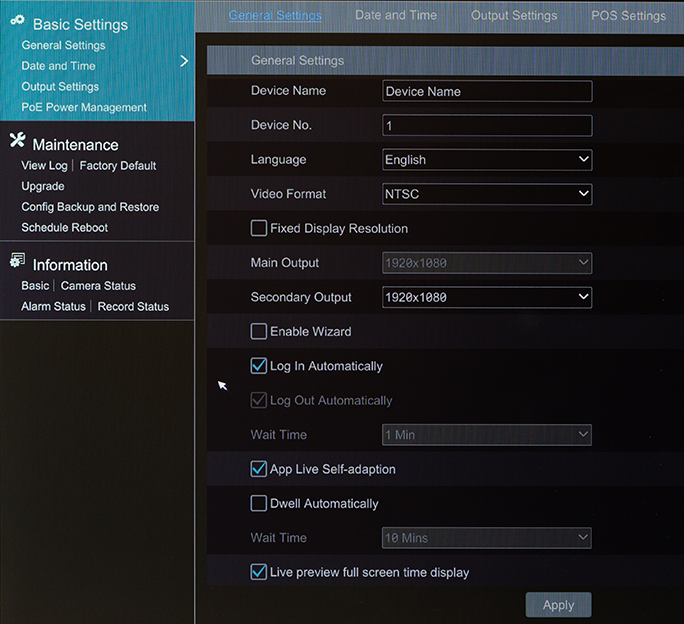
Here you prescribe fundamental settings for your system.
Device Name and Number does not appear in displays; it’s available for housekeeping/inventory use.
Set the Video Format based on your location (NTSC in North America, and PAL in Europe).
Enable Fixed Display Resolution to adjust the resolution of the stream to your specifications.
Main Output and Secondary Output: Your NVR has an HDMI output as well as a VGA output for local interface use. Both screens show the same content. Here you set the resolution of those screens.
Enable Wizard: The setup wizard launches on both the local and web interface when you first activate the NVR, or after you factory reset it. You can disable it here.
Log In Automatically: Ordinarily, the NVR requires you to log in to access the local interface. If this is enabled, you are not required to submit credentials to access the interface. This disables Log Out Automatically.
Log Out Automatically: This gets enabled by default when Log In is disabled, but you can disable it. When enabled, you can select the wait time before it logs you out (10 seconds to 10 minutes).
App Live Self-adaptation: When enabled, the NVR adjusts resolution for the Luma View app based on the internet connection.
When you enable Dwell Automatically and select a time, then, if the system has not been operated by a user in that specified amount of time, the system switches to the next camera or grid view.
Live preview full screen time display: This adds a time stamp when viewing a stream in full-screen mode.
Date and Time tab
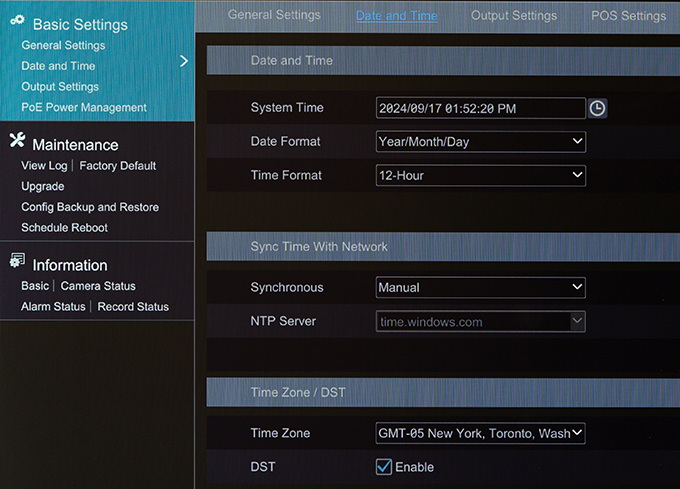
You have three options for maintaining your NVR’s time clock.
If you want it to coordinate with one of the national servers, set Synchronous to NTP and select your preferred NTP server. This is our recommended setting.
If you want it to synchronize with your computer, set Synchronous to Manual and enable Synchronize with computer time. The NVR syncs with the computer once, then maintains its own time henceforth.
You can also define the NVR time yourself. Set Synchronous to Manual. Click in the System Time box, set the date, and set the NVR time at the bottom. Click Apply. The NVR resets to that time, then maintains its own time going forward.
Use the dropdowns at the top to adjust how the timestamp appears. Set the time zone and daylight saving setting at the bottom.
Output Settings tab
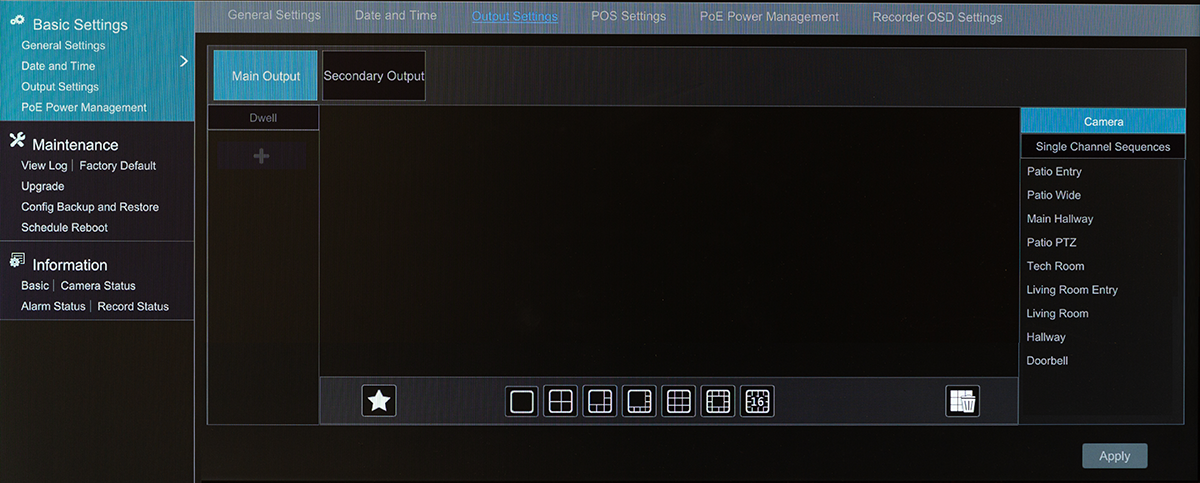
This is where you manage your display schemes. A scheme is a selection of cameras in a specific arrangement. This page has three primary areas.
-
Left Column: To the left, the NVR displays the NVR's dwell schemes.
-
Center Area: The center area shows the selected display scheme and a toolbar.
-
Right Column: To the right you can select various cameras and groups.
To create a new scheme, click the + icon in the left column. When you have at least one scheme, you can select it by clicking on it (the outline turns blue), or delete it by clicking the X at the top right. When a scheme is selected, you can edit it using the center toolbar. Note that the toolbar allows you to select the scheme as a favorite (with the starred button at left).
To customize a scheme,
-
select it in the left column,
-
choose the multicamera display in the toolbar,
-
select a camera window in the display, then
-
double-click a camera or sequence in the right column.
A single camera cannot appear twice in the same scheme. To remove a camera from a scheme, select its window then click the trashcan icon in the toolbar, or right-click the camera and select Clear.
Click Apply to save all changes.
POS Settings tab
To use POS surveillance, choose one of the POS lines in the table. Set Enable to ON and choose the connection type. Click Configure to open a dialog where you set the POS IP address. If needed, click the POS Port checkbox and enter its port number in the text box. Finally, select your POS protocol.
Click the Trigger Camera checkbox, then click the just-enabled Configure button to bind the POS to the camera. One POS can be bound to multiple channels, but each channel can be bound to only one POS.
Under Display Settings, click Configure to set the
-
General Settings, where you set the characters that define the text that gets displayed
-
Display Position, where you can draw a box to define the POS inset
-
Display Mode, where you select the font color(s) and display method of the POS information. If you select multiple colors, then the OSD colors each line of text with a different color.
Finally, set the format for the data. Click Apply to save all changes.
PoE Power Management tab
Recorder OSD Settings tab
Maintenance page
View Log tab
Here you can review all activities in the system.
When the window opens, it displays all events. To filter, choose the type of log you want to view next to Main Type, select the starting and ending time, and click Search.
Click Export to save a text file of the logs to your computer’s Downloads folder.
Factory Default tab
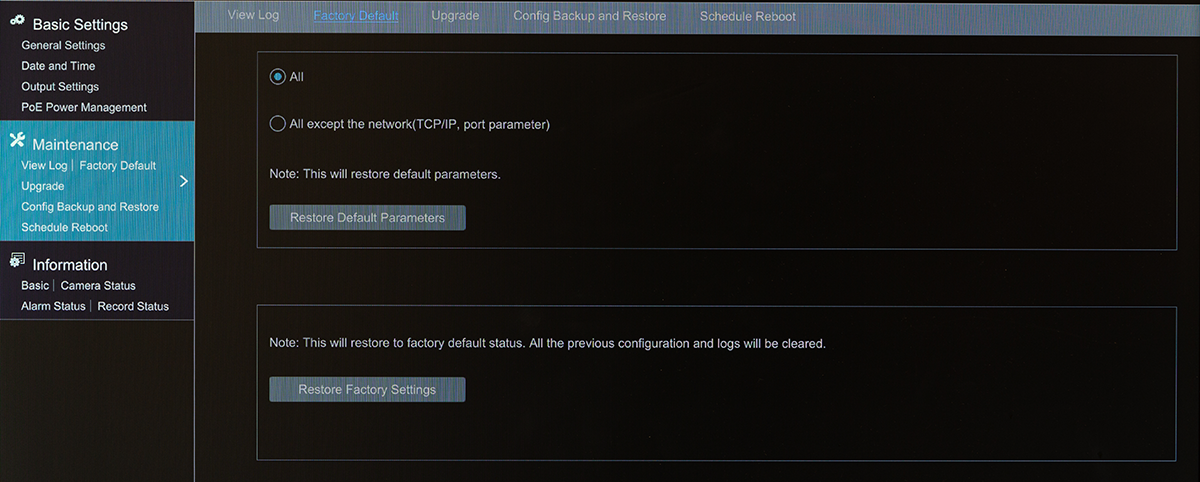
There are three levels of default that you can choose.
-
All: This resets all customization you have done. It does not reset the firmware, time zone, video format, or the admin password.
-
All except the network: This keeps all IP settings (default gateway, ports, etc.) but resets all surveillance settings. This will not change the time zone, video format, or the admin password.
-
Restore factory default: This resets everything to where it was when you took it out of the box.
Upgrade tab
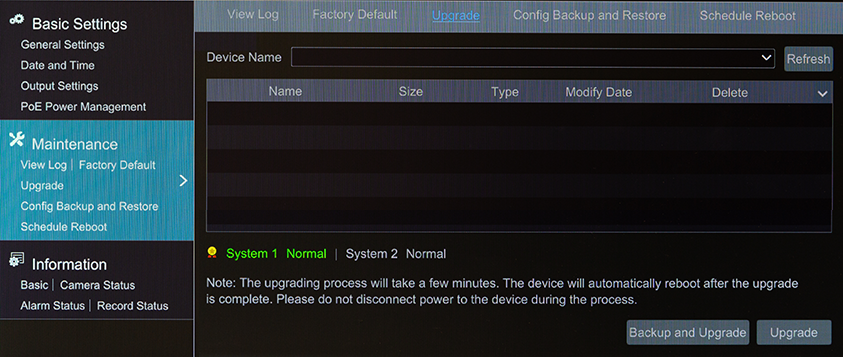
To update the NVR to the latest firmware, copy the new firmware (a file with a .tar extension) onto a USB storage device. Insert the USB drive into the NVR.
Select the USB device using Device Name dropdown (click Refresh if necessary). Select the firmware file and click Upgrade to install the firmware on the system, or Backup and Upgrade to first export a copy of the current firmware to the USB drive, and then update. The system may automatically restart during a firmware update. Do not power off the NVR during a firmware update.
Pro Tip: The USB must use FAT32/NTFS format.
Luma x20 and x21 devices run in a dual-firmware mode to protect the hardware (and your installs) from unforeseen glitches.
Once the firmware has been applied to the first (operational) partition, the device goes into an observation mode to ensure the new firmware operates properly. Observation mode lasts for about ten minutes once the firmware update is completed.
Once proper function has been verified, the device applies the firmware to the second (backup) partition and logs the new firmware version with OvrC. If the new firmware fails, the device restores the backup firmware to the first (operational) partition.
As of this writing, OvrC does not track whether a Luma x20 device is in observation mode. This means that, for about ten minutes in OvrC, it looks like the firmware update didn’t take, and that an update is available. If you try to update the firmware again while your Luma is in observation mode, the update will fail in OvrC but this will not impact the performance of the device.
Config Backup and Restore tab
Pro Tip: The USB must use FAT32/NTFS format.
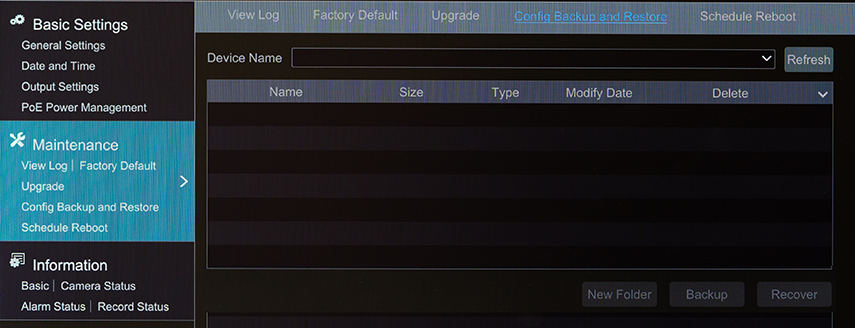
Plug the USB drive into the NVR. Select the USB device using Device Name dropdown (click Refresh if necessary).
New Folder: Creates a new folder on the selected USB.
Backup: Navigate to where you want to store the config backup file. Click Backup and confirm the choice.
Recover: Navigate to the config file you want to load. Click Recover and confirm the choice.
Schedule Reboot tab
Information page
Basic tab
Here you find the NVR's SKU, service tag, and video format.
Click the View button next to About this machine to open additional information about this machine, including firmware, plugin, and ONVIF versions.
Camera Status tab
Alarm Status tab
This displays each alarm the NVR handles (including those on active cameras). If an alarm has an alert or exception, click the down arrow at right to see more information.
Record Status tab
This gives basic information for each camera stream to assist with troubleshooting. You cannot edit anything.
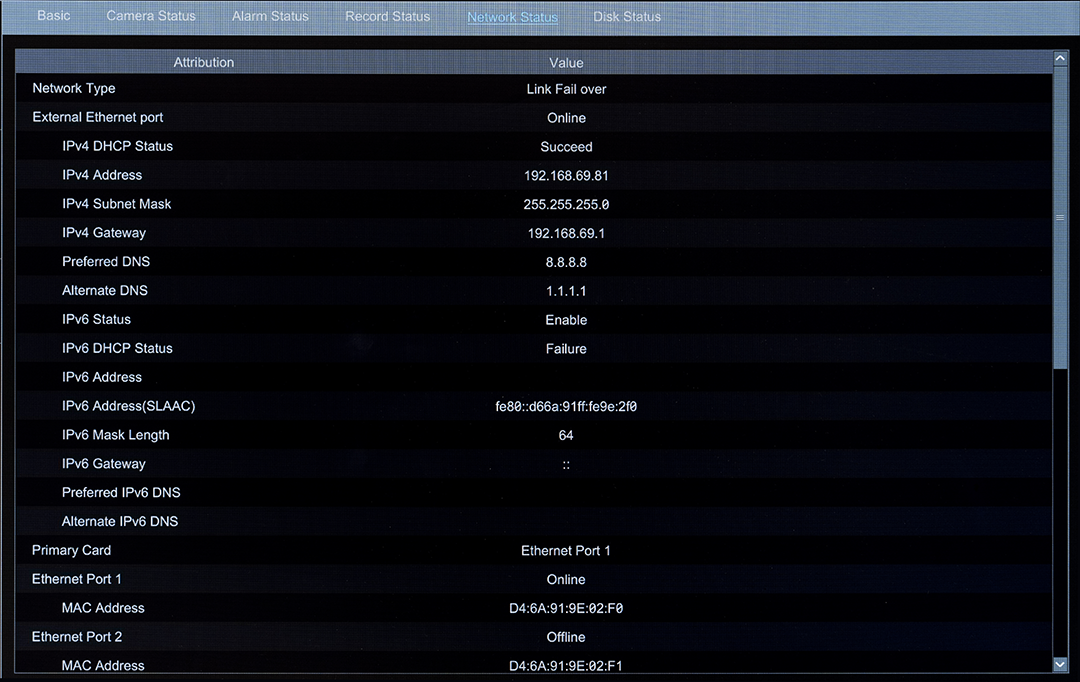
Network Status tab
This gives basic information on the NVR’s network to assist with troubleshooting. You cannot edit anything.
